The best place to start exploring 4-dimensional space is with the
hypercube (or 4-cube, tesseract, octachoron). And the
best way to understand the hypercube is by analogy with its 3-dimensional
version, the 3-cube.
The viewer shows a 4-cube by default. We'll also use it to show a 3-cube and
draw parallels between the two. (You can follow on two viewers by opening the
viewer page in two browser windows; to display a 3-cube, click
polytopes..., then in the polytopes dialog select dimension 3 and
click OK). In both windows, click
reset polytope and make sure
w-perspective and z-perspective are unchecked. Both viewers
should show:
cube initial view, 3-d and 4-d  |
In n dimensions, an n-cube's edges run in n perpendicular directions.
For each cube in its initial position, the first direction,
x, is horizontal, the second, y,
is vertical, and the rest are perpendicular to the plane of the screen, so without
perspective they are hidden. Rotating each cube slightly in the xy-plane by
pressing the xy button gives something like this
(to reverse rotate, right- or Ctrl-click):
xy-rotated cube, 3-d and 4-d 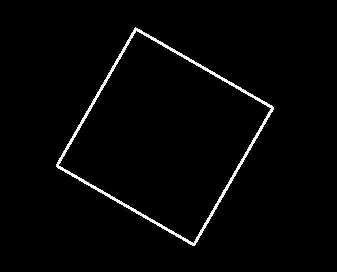 |
Since the rotation only involves x and y, the edges perpendicular to
the screen remain so, still hidden. Now press xz to rotate each cube
horizontally, getting something like this:
after xz-rotation, 3-d and 4-d 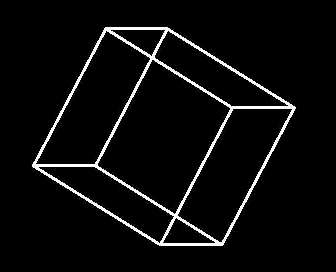 |
Now edges are seen running in three directions. For the actual cube edges, these
directions are
all perpendicular, but since the screen is two-dimensional, their projections cannot be.
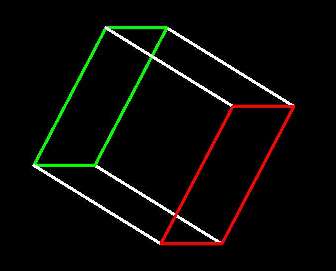
After the xz-rotation,
the edges that were formerly aligned in the z direction now have an
"x component" and are seen on the screen as horizontal.
Notice that the 3-cube can be seen as the two squares that were previously
superimposed now displaced and
with corresponding corners (vertices) joined:
opposite faces of 3-cube 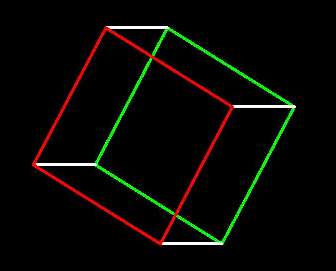 |
(To color the faces of the 3-cube on your viewer, click the cells... button,
under new cell in the cells dialog click begin, and click on the edges
of the face you want until it's colored (click clear if you get the wrong
face), then click finish. Click begin again to
highlight another face, click clear all to start all over. See here for
an explanation of this facility. Or you can just do
this.
Note that you can't do this reliably with the 4-cube at
this point, since every edge you see is really two, with the same x,
y, and z values, but different w
(see below), and the program doesn't know which you mean to click on.)
A 3-cube in fact has three pairs of opposite faces
thus connected, the other two being:
The 3-cube's story ends there, but the 4-cube, which you should have looking
pretty much like the above without the colors, still has a set of edges
hidden, running in a fourth direction I label w. To see them,
rotate the 4-cube with yw to give them a y component:
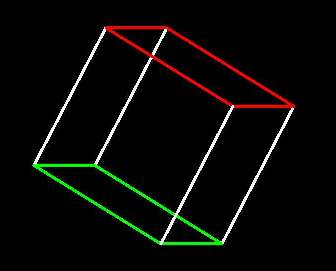
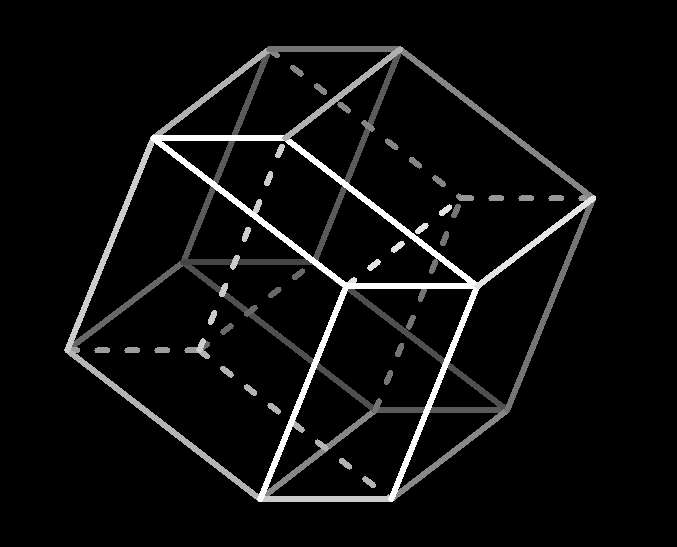
4-cube after yz-rotation 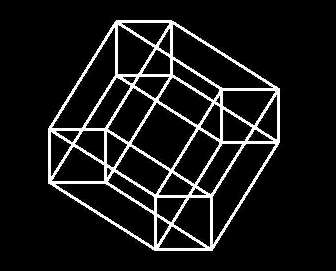 |
Now you're seeing the entire 4-cube.
To make some sense of this confusing figure, notice that it
can be seen as two copies of the 3-cube we were just seeing,
that were superimposed and are now displaced vertically and connected by
the newly-visible w-edges:
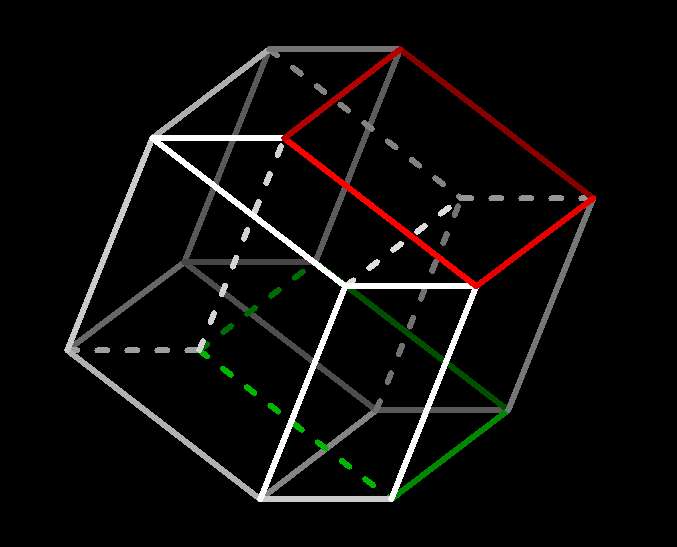
4-cube with opposite facets highlighted 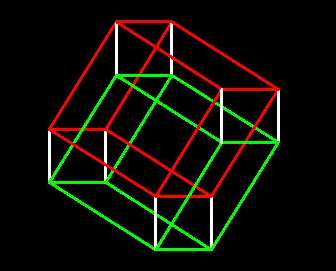 |
Analogous to the 3-cube and its square faces, the 4-cube has four pairs of
opposite 3-cube "facets". They do the same job, forming the boundary of
the four-cube, separating its interior and exterior. It's a good exercise
to find the other three pairs yourself (use cells...!), or look
here.
 |
3-d perpendicular projection onto xy plane
To study four-dimensional polytopes that live in xyzw-space,
we project them down to familiar xyz-space,
and then project that three-dimensional figure onto the xy-space
of the viewscreen. With perspective turned off, the projection is
perpendicular, as above in the 3d-to-2d case. An important point is
that rotations that involve only the dimensions of the space we're
projecting to don't essentially change the projected figure - they only
rotate it. For 3d-to-2d this is particularly simple:
 |
 |
xy-rotation gives a congruent xy projection
We'll take the same idea one dimension higher. To get a better sense of how
the xyz-projection sits in 3-space, click options..., then under
both polytope exterior and polytope interior check
z-shading, and under polytope interior press dash.
Working with the default 4-cube, starting from reset all and pressing
xy, xz, yz, and xw briefly will give something
like this:
 |
Consider that the 4-cube has been perpendicularly projected to our
familiar xyz-space, where x and y are the respective
horizontal and vertical dimensions of the screen and z runs from you
toward the screen. Edges are shaded more dimly the farther they are from you
in the z direction, and edges in the interior of the
xyz-projection are dashed (in 4-space itself, the 4-cube has no interior
edges, any more than a 3-cube in 3-space does).
Now try any of xy, xz, and/or yz,
and notice that you have essentially the same 3-d figure. Just as with the
case of 3d-to-2d projection, applying rotations that involve only x,
y, and z to a 4-d figure only rotate its xyz-projection
without otherwise changing it; all angles and lengths remain the same,
interior edges remain interior and exterior remain exterior.
(Tip: you can also rotate the figure
in xyz-space by
clicking-and-dragging
with your mouse. To rotate in xyw-space press Shift while dragging.)
Starting from that same figure and pressing
yw (actually Ctrl- or right-clicking: remember,
this just reverses the direction of rotation) eventually effects the
following transformation:
 |
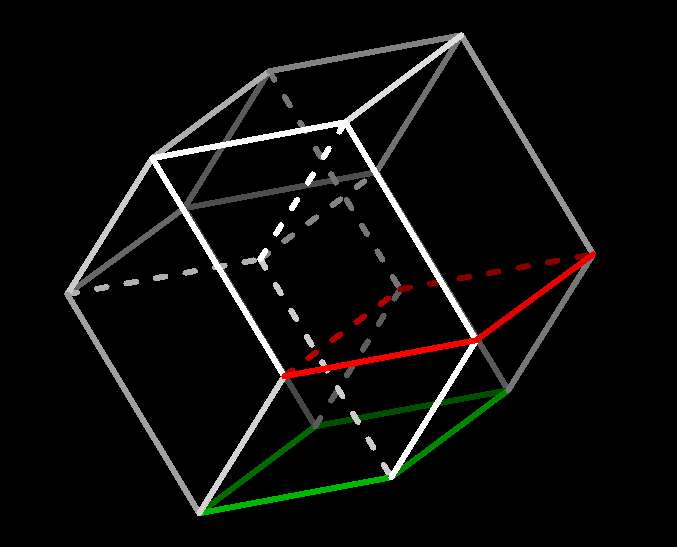 |
yw-rotation essentially changes the xyz projection
Here the xyz-projection has changed essentially: for instance some edges
have moved from exterior to interior, and vice-versa.
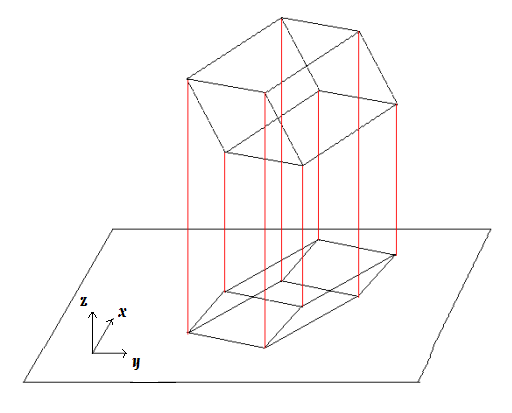
Finally, let's get a sense of what is happening with rotations that involve
w. We first introduce the notion of perspective projection. In the
3d-to-2d case, I call it
z-perspective; it's standard and
the following diagram illustrates it:
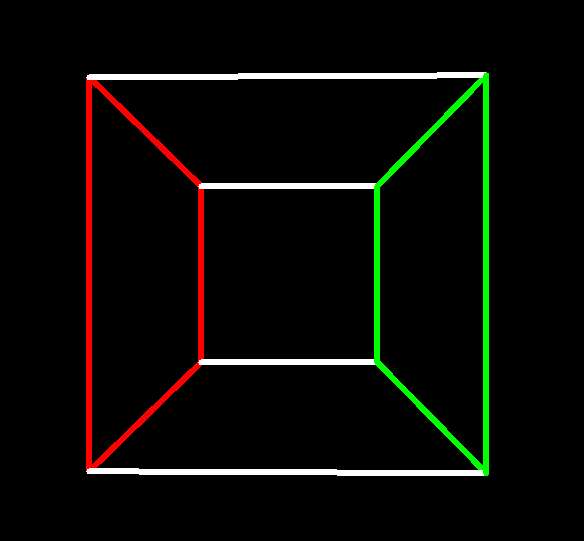
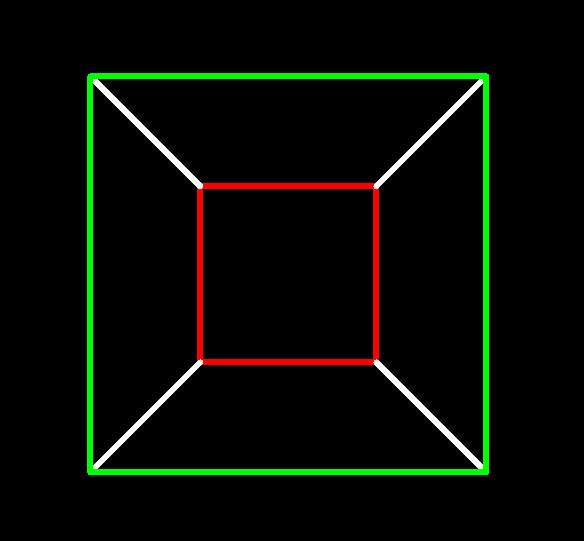
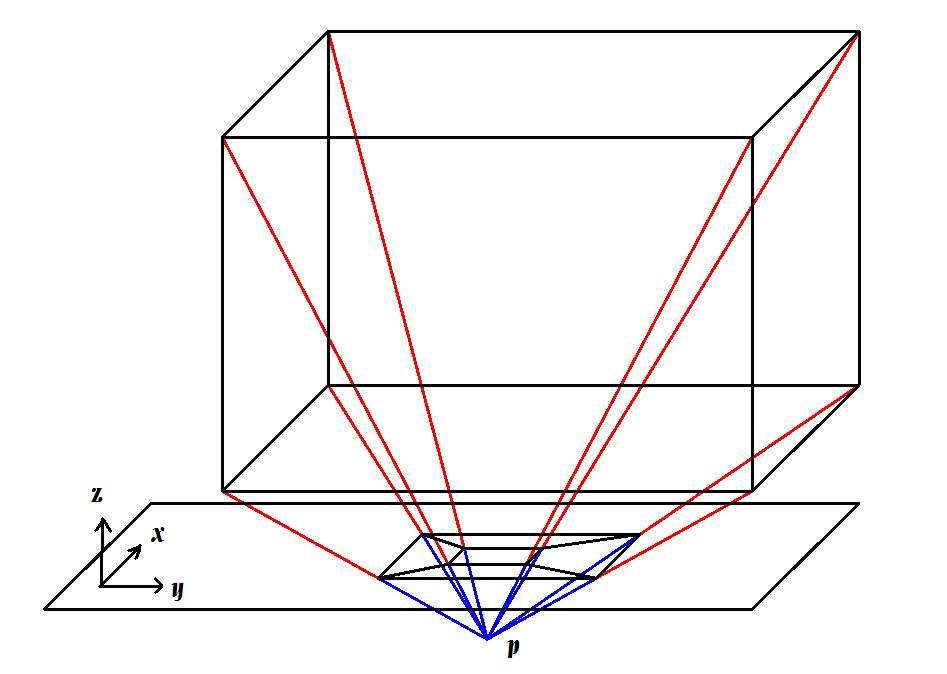 |
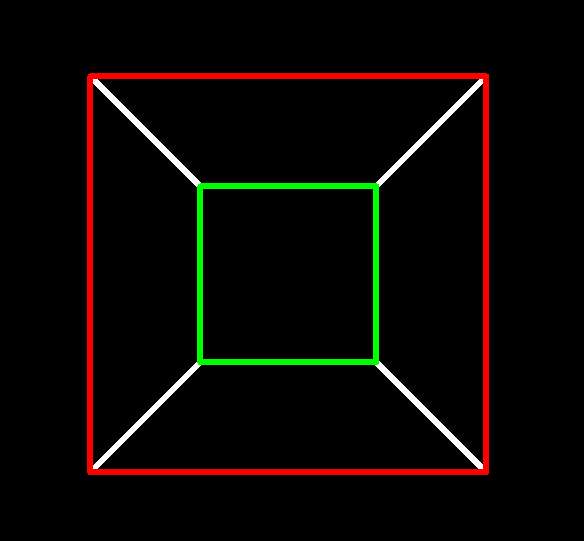
standard "z-perspective" projection of 3-cube in initial orientation
We place a viewpoint p so that the cube is "in front of" p,
i.e., the cube lies in the positive z direction from p,
and place a projection plane parallel to the
xy-plane between p and the cube
1. Rays are traced from p to each point
of the figure, and where that ray crosses the projection plane is that point's
projection. As shown in the diagram,
the face of the 3-cube closest to p in the z direction
projects to a square and the farthest one projects to a smaller square inside
it.
 |
|
 |
|
| 3-cube, initial position, z-perspective |
|
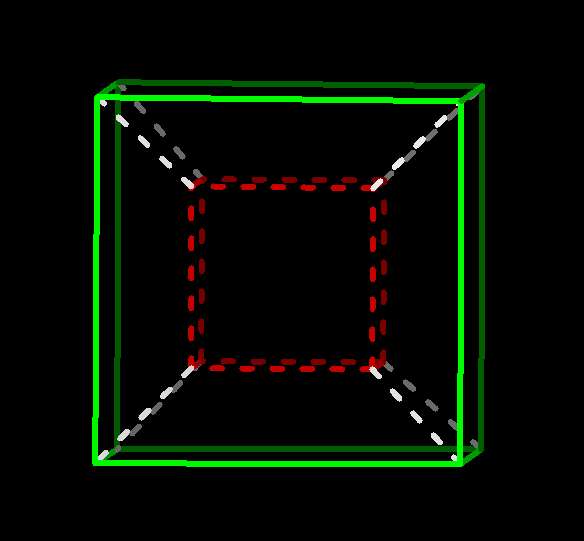
4-cube, (near) initial position, w-perspective |
|
 |
|
 |
|
| xz-rotation begins |
|
xw-rotation begins |
|
 |
|
 |
|
 |
|
 |
|
~45° : Red face's trailing edge's closest
approach to,
and green face's trailing
edge's farthest retreat from, p |
|
Red facet's trailing faces's closest
approach to,
and green facet's trailing
face's farthest retreat from, q |
|
 |
|
 |
|
| Red face about to turn inside out |
|
Red facet about to do the same |
|
 |
|
 |
|
| 90° : Equipoise! |
|
|
|
 |
|
 |
|
| Green face about to turn inside out |
|
Green facet ditto |
|
 |
|
 |
|
~135° : Red face's leading edge's farthest
retreat from,
and green face's leading
edge's closest approach to, p |
|
Red facet's leading face's farthest
retreat from,
and green facet's leading
face's closest approach to, q |
|
 |
|
 |
 |
|
 |
|
| 180° : Tables turned |
|
|
|
| |
| |
| |
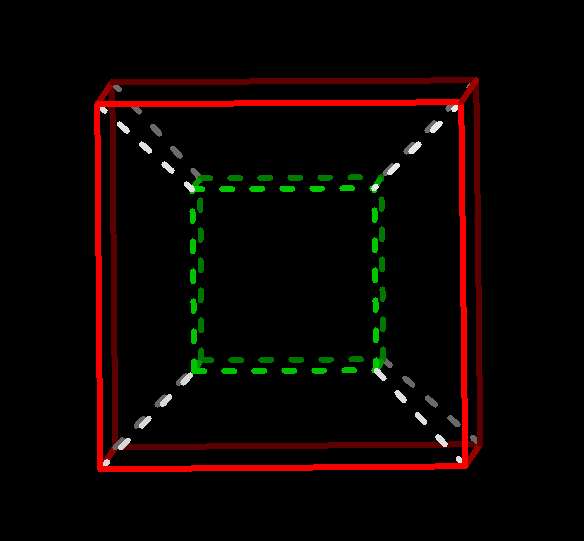
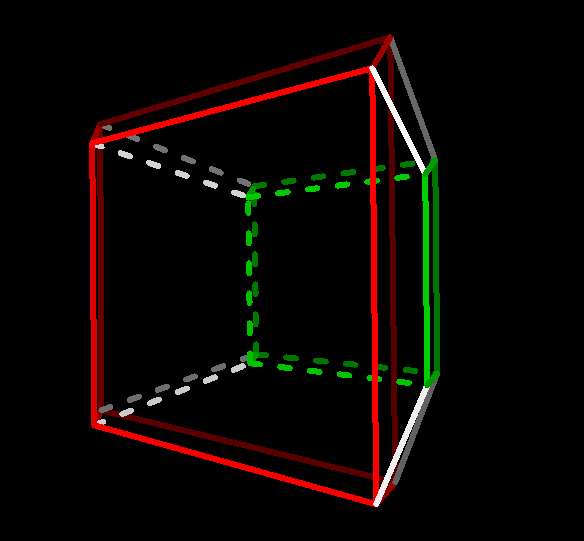
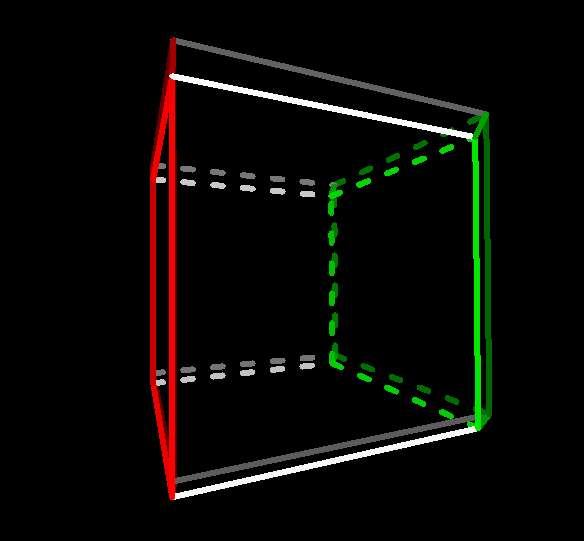
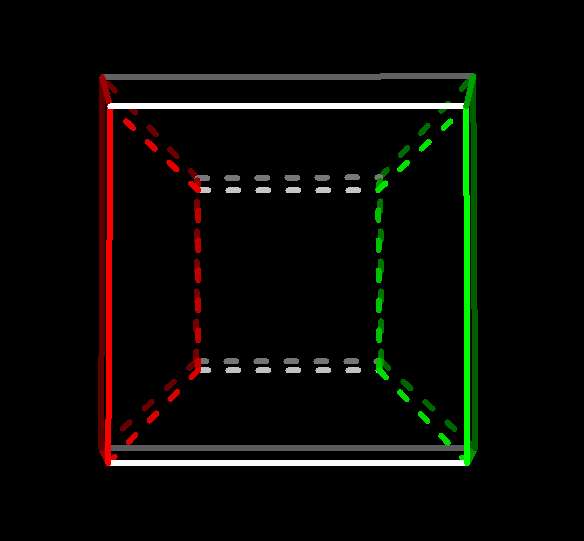
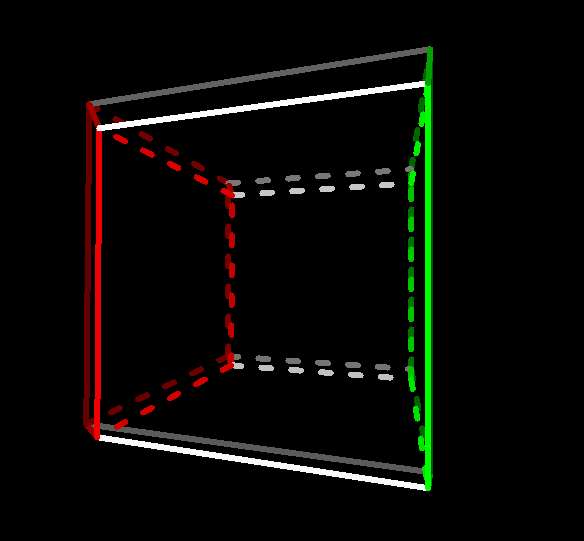
One can use an analogous (and again, standard) method to project
a 4-cube from xyzw-space to xyz-space, which I call w-perspective.
One places a viewpoint q so that the 4-cube lies in the positive
w direction from (i.e. "in front of") it, places a 3-dimensional
xyz hyperplane in front of q, traces rays from q to the
points of the figure, and projects each point to where its ray crosses the
hyperplane. Comparing a 3-cube shown in z-perspective and 4-cube
shown in w-perspective, both in initial position (jostling the
4-cube slightly so as to be able to see it all),
we see that the 4-cube's projection has a (3-)cube-within-a-cube corresponding to
the 3-cube's square-within-a-square. The outer-projecting 3-cube facet
(shown in red) is
the one closest to q in the w direction, the inner-projecting
one (shown in green) is the farthest.
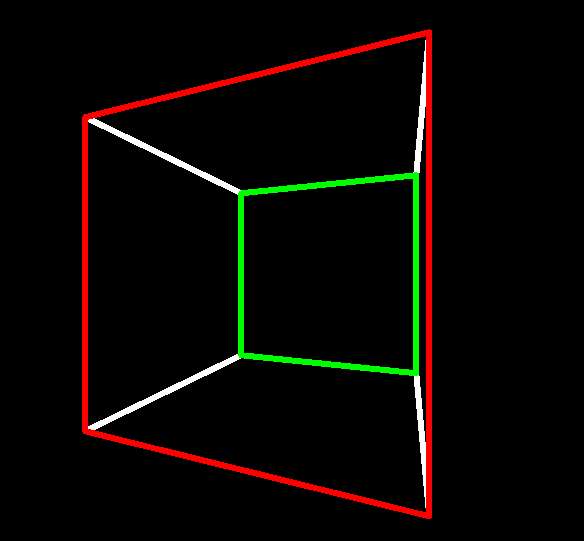
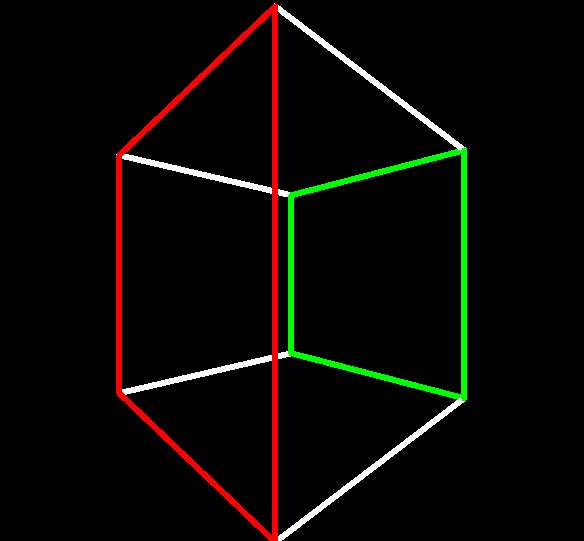
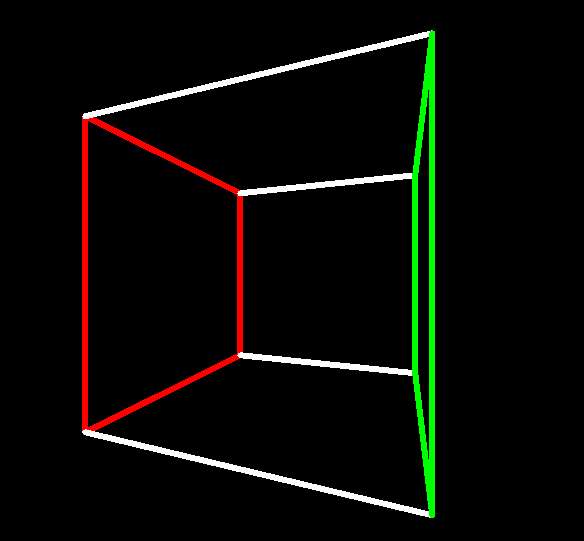
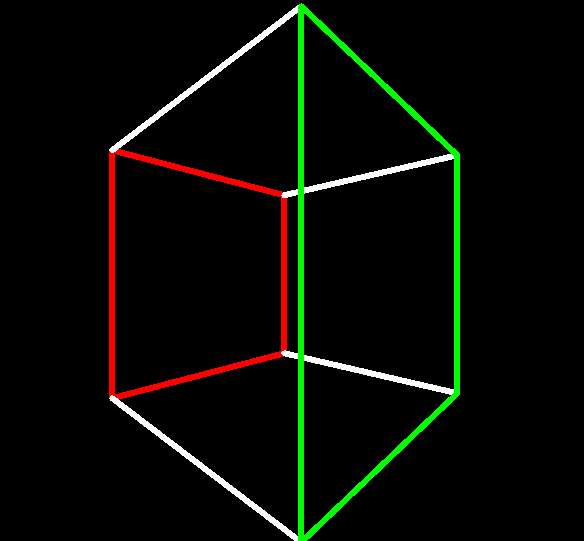
Now to the rotation. First understand that with xw-rotation every
point's x and w coordinates are changing in exactly the way
that x and y change when you do an xy-rotation, viz.
rotate something about the z-axis in 3-space, and the other coordinates
don't change at all 2.
The w
dimension is no different than any of the others, it was just unlucky enough
to arrive last.
Rotate the 3-cube with xz
and the 4-cube with xw. Even though the faces of the 3-cube are
all the same fixed size, as the red and green rotate to
each other's former positions, the first's 2-d projection (eventually) shrinks and the
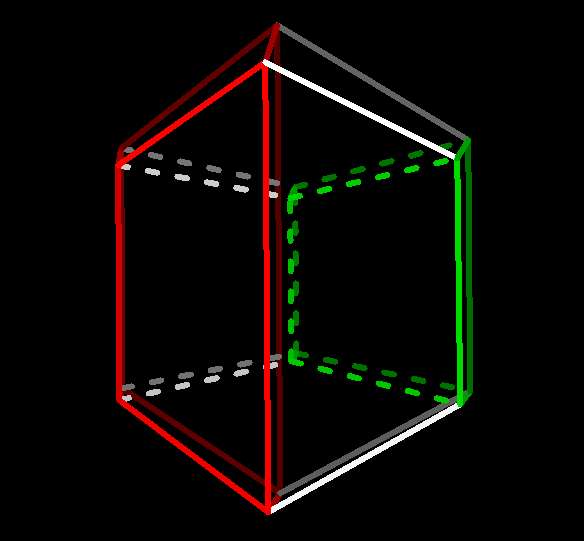
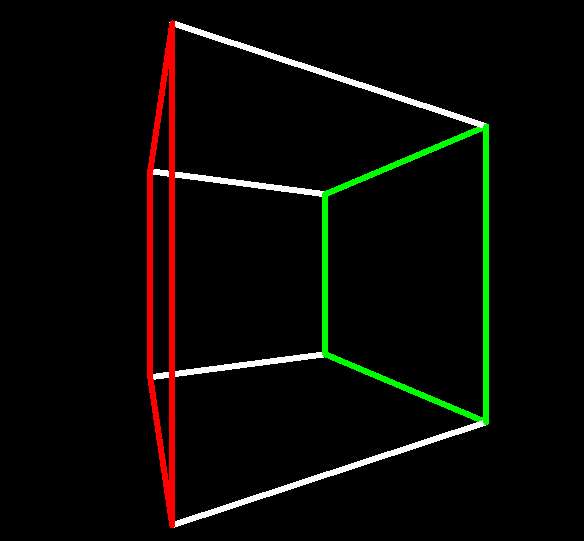
second's grows, and both exchange their own inside and outside. Not
remarkable for us since we innately understand that the actual sizes and angles are
fixed and automatically interpret projected size as an indicator of
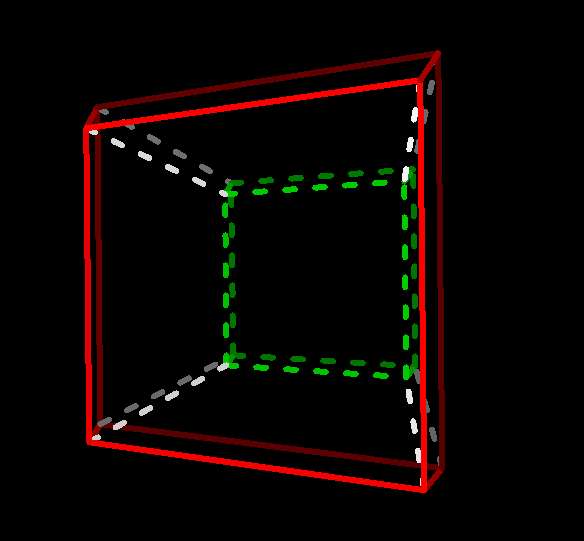
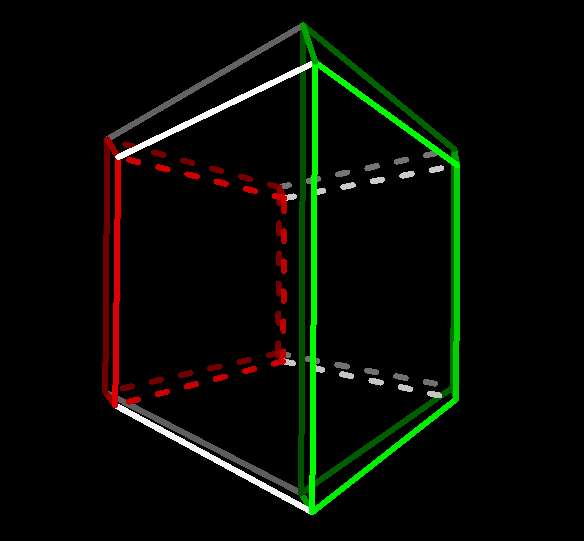
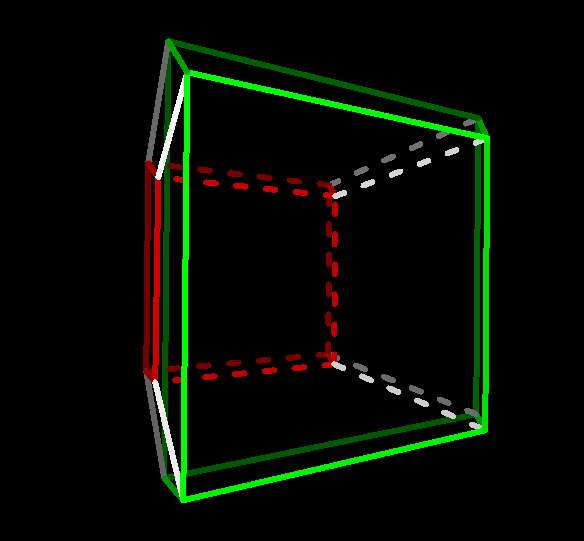
z-distance. The trick is to see the relationship between the
3-cube's rotation and its 2-d projection, and understand that the same thing is
happening with the 4-cube and its 3-d projection: in the full 4-dimensional
hypercube all edges are the same length and all angles are right angles,
but in the projected 3-space figure, those lengths (and so necessarily the
angles) change according to each edge's w-distance from the viewpoint
q. A simple rotation in 4-space causes the 3-space projection to
turn inside out.
You can also find discussion and animations of this phenomenon
here,
with an artist's viewpoint and the math shown explicitly if you
want it.